
Garage Organization From Scratch: What to Expect and Where to Start
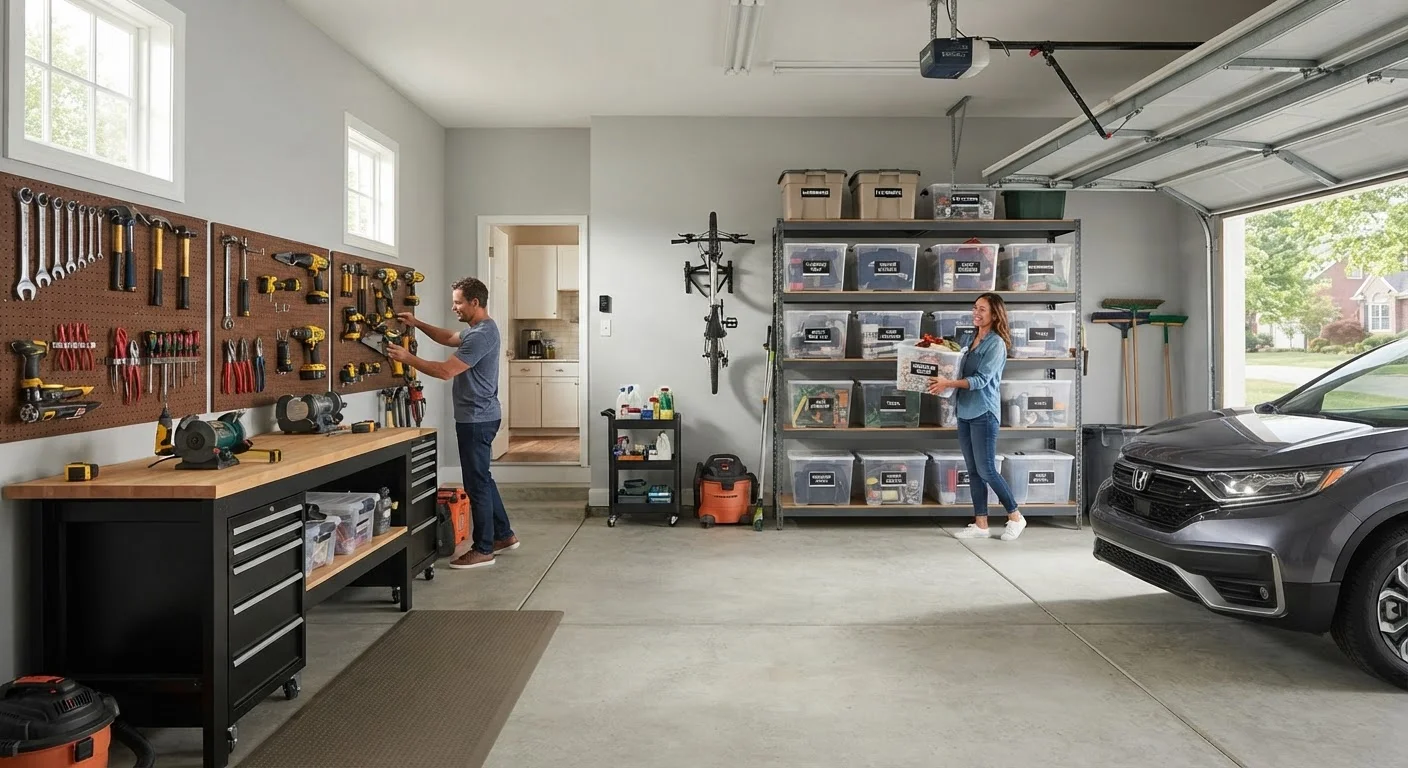
Photo credit: FaqBulletin.com | Information Made Easy
In this article
Garages are among the hardest spaces to organize. This beginner-friendly overview covers zoning, storage types, safety, and realistic first steps.
Key Takeaways
- Garages accumulate clutter because they serve too many purposes without clear boundaries.
- A full empty-and-sort session before buying storage prevents expensive mistakes.
- Dividing your garage into activity-based zones is the single most effective organizing strategy.
- Wall and ceiling storage dramatically increases usable space without expanding your footprint.
- Safety considerations — including hazardous materials and load limits — must come first.
- Maintenance is easier when every category of item has a designated home.
Why Garages Are So Hard to Organize
The garage is the only room in most homes with no agreed-upon purpose. It absorbs overflow from every other space — holiday decorations, sporting equipment, gardening tools, car supplies, half-finished projects — without any natural organizing logic to resist the drift. Add a wide door that makes it easy to haul things in but not out, and you have the perfect conditions for clutter to compound year after year.
Understanding this dynamic matters because it shifts your approach. Garage organization isn't about finding a better bin. It's about imposing a structure that the space doesn't have by default. That structure starts with decisions, not purchases.
Zone
A designated area of a space assigned a single, specific purpose — such as gardening tools or automotive supplies — so every item has a logical home.
Vertical storage
Using wall height and ceiling space to store items above floor level, freeing up ground area for vehicles or work activities.
Stud
A vertical wood or metal framing member inside your garage wall. Anchoring heavy shelves into studs is essential for safe, secure installation.
Household hazardous waste
Items like paints, batteries, solvents, and pesticides that require special disposal rather than being placed in regular trash or recycling.
Slat wall
A wall panel system with horizontal grooves that accept interchangeable hooks, shelves, and bins — a flexible alternative to fixed pegboards.
Set Realistic Expectations Before You Begin
If your garage has been accumulating for years, one Saturday will not fix it. Plan for at least a full weekend for the initial sort, with follow-up sessions for installation and fine-tuning. That's not a failure — that's the realistic scope of the project.
You'll also encounter decisions that feel harder than they should: items with sentimental weight, things kept "just in case," duplicates you forgot you owned. Budget mental energy for those moments, not just physical labor.
Finally, resist the urge to shop first. The most persistent organizing myth is that the right container solves the problem. It doesn't — knowing exactly what you own and what you need to store is what tells you which containers to buy.
Step One: Empty, Sort, and Decide
Pull everything out of the garage. Yes, everything. Seeing all of your belongings together — spread across the driveway on a dry day — is the only reliable way to grasp the true volume and make honest decisions. Sort into four categories:
- Keep and store in the garage — items used regularly and genuinely belonging here
- Relocate — things that drifted in from the house and should go back
- Donate or sell — functional items your household no longer needs
- Dispose — broken, expired, or hazardous items requiring proper disposal
Once the keep pile is established, group items by activity: automotive, gardening, tools, sports, seasonal. These natural groupings become your zones. Do not return a single item to the garage until you have a plan for where it will live.
Take Photos Before You Sort
Before pulling items off shelves or emptying bins, photograph your garage from multiple angles. These before images help you remember what you started with, track progress, and make better decisions if fatigue sets in partway through the project.
Zoning Your Garage for Everyday Function
Zoning assigns every area of your garage a clear, dedicated purpose — the same principle that works throughout the home, as explored in our guide to zone-based home organization. In a garage, common zones include:
- Entry/transitional zone — nearest the door to the house; hooks, a small bench, everyday-access items
- Automotive zone — fluids, tools, and supplies for vehicle maintenance (see also: car ownership essentials)
- Garden and outdoor zone — tools, soil amendments, pots, hoses
- Sports and recreation zone — bikes, balls, gear organized by season
- Workshop or project zone — workbench, power tools, hardware
- Seasonal/overflow zone — holiday decor and infrequently used items, ideally elevated
Draw a rough floor plan and assign zones before moving anything back. High-traffic items belong near the main entry points; rarely used seasonal items belong in the hardest-to-reach corners or overhead.
Choosing the Right Storage for Each Zone
Once zones are defined, storage decisions become straightforward. Match the storage type to the zone's demands:
- Wall-mounted shelving — versatile for tools, bins, and supplies; keeps the floor clear for parking
- Pegboards and slat walls — ideal for hand tools, cords, and items whose configuration changes often
- Ceiling-mounted racks — best for seasonal bins and bulky items used only a few times per year
- Freestanding shelving units — useful in the workshop or garden zone for heavy, frequently accessed items
- Labeled bins and clear containers — essential for any category with multiple small parts
The choice between vertical and horizontal storage matters especially in a garage: most households dramatically underuse wall and ceiling real estate while crowding the floor. Going vertical is almost always the better trade-off, particularly if you intend to park a vehicle inside.
Safety, Permits, and Keeping It Maintained
Before you install anything heavy, verify that wall anchors are rated for the load and fastened into studs or appropriate masonry. Ceiling-mounted racks must be secured to joists — check with a licensed contractor if you're uncertain. Heavy wall shelving, electrical additions, and structural modifications may require permits in your area; contact your local building department to confirm requirements before starting that work.
Hazardous materials — paints, solvents, pesticides, propane — need dedicated, locked storage away from heat sources and ignition points. Keep flammables away from your water heater and any gas appliances. Store chemicals in original, labeled containers and dispose of expired or unwanted products through your municipality's hazardous waste program.
Maintenance is what separates a one-time project from a lasting system. Do a brief monthly reset — return items that have drifted, note what's running low, and flag anything that no longer belongs. A few minutes monthly is far easier than another full-weekend overhaul.
If you're also working on outdoor spaces, the same methodical approach applies — our guide to starting a backyard garden from scratch walks through a similarly structured process for planning and building from the ground up.
Never Exceed Shelf or Rack Weight Limits
Every shelving unit and ceiling rack has a rated weight capacity listed by the manufacturer. Exceeding that limit risks sudden collapse, which can cause serious injury or damage to vehicles and belongings. When in doubt, divide heavy items across multiple storage points or consult a contractor for reinforced solutions.
Frequently Asked Questions

Author
Home & Garden Editorial Team
Home & Garden Editorial Team is the collective byline for our editorial team and contributor network. Articles published under this byline or an editorial pen name are researched, written, and reviewed according to our editorial standards for clarity, consistency, and independence before publication.
View all articles →